
Getting Started
Table of Contents
Plugin activation
Upon plugin activation, a page is automatically created for you, titled: Documentation.
You can change the title of “Documentation” to whatever you like, but mind you that it should make sense.
In the contents of this page you’ll find a shortcode, called docs_base .
You can dress up the page however you like, but it’s important that this shortcode remains in place somewhere on the page. This shortcode is used to render a list of links to each of your Help Scout Docs categories.
Setting up Help Scout Docs for WordPress
The plugin’s settings can be found in your admin area under Settings > WP Help Scout Docs.
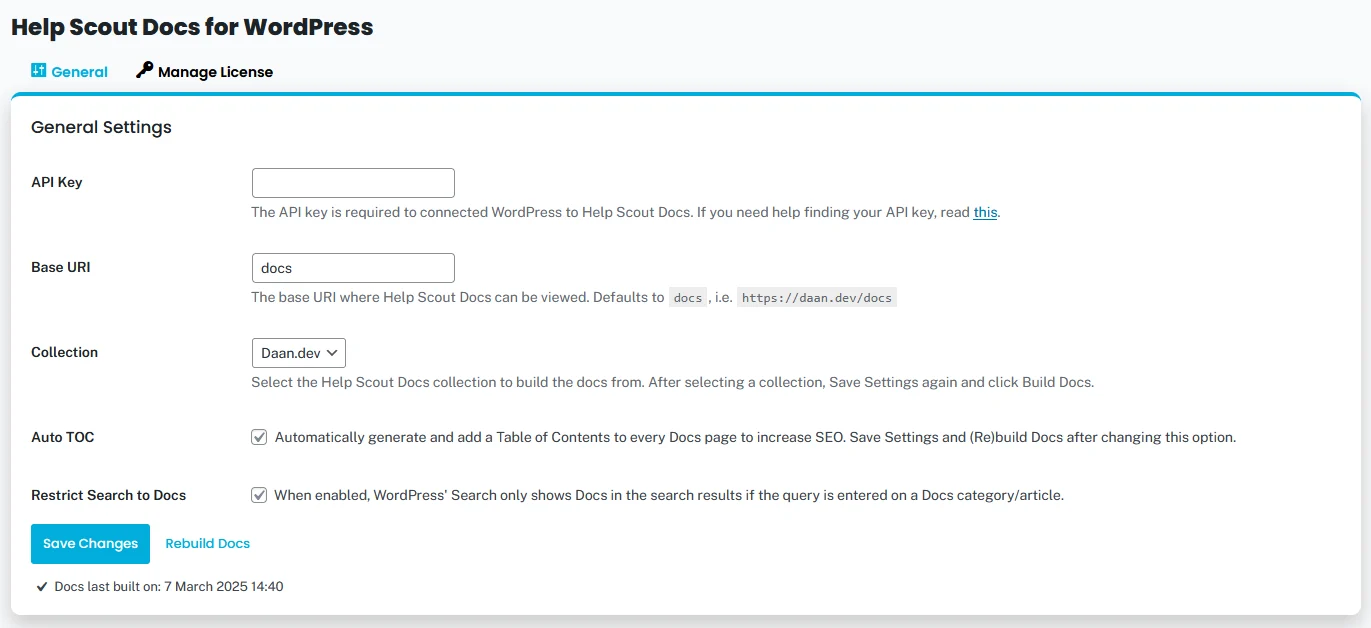
They’re quite straight forward. All you need to do is create an API key in Help Scout, paste it and hit Save Changes.
You can also choose to change the value of the Base option. The default is “docs”, which should suffice in most situations. If you were to change to e.g. “help”, your Docs section can be found at yourdomain.com/help.
After saving your API key, you’ll notice that the Collection option has appeared, containing the available collections in your Help Scout Docs.
Select the collection you wish to connect to your WordPress instance and enable the Auto TOC, Compress Images and Restrict Search to Docs options if you so wish. Hit Save Changes again. A Sync Docs button will appear. Hit it to prime the cache of your documentation.
Syncing the docs might take a while, depending on the size of your Help Scout Docs. What it does is, basically, is fetch a list of categories, their names, IDs and article titles. These are needed to render the articles when requested.
The images in your articles are stored on your own site, too. So your visitors never connect to Help Scout, which is great for both their privacy and your page speed. With Compress Images enabled (default: on), they’re saved as lightweight WebP files, so your docs load even faster.
Using constants to set up WP Help Scout Docs
Agencies and developers can also configure WP Help Scout Docs using constants in wp-config.php. See the Developer Docs.