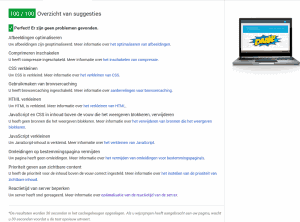
How to get a 100/100 Score on Pingdom & Google Pagespeed Insights
Choosing the right host to serve your website can be such a pain. If you’re a small business owner or a startup, you usually don’t have the funds to invest in “fancy” WordPress-hosting.
Luckily this doesn’t mean you’re site has to load sluggish. With the right tools you can give these “fancy” WordPress-hosts using Varnish & Nginx a run for their money.
In this guide I’m going to show you how to get a perfect score on Pingdom and Google Pagespeed Insights with W3TC and Autoptimize.
This document contains outdated information.
I’ve revisited this topic recently, containing more relevant and up-to-date information aligning with the new specifications provided by Pingdom and Pagespeed Insights. If you’re looking for an up-to-date, quick and easy way to achieve a 100/100 on Pagespeed Insights and Pingdom. I suggest you follow that link.
Tools that will get You a 100/100 on Pingdom and Google Pagespeed Insights
In order to speed up your WordPress website you’re going to need the right tools. Luckily all of these tools are free.
- W3 Total Cache
- Autoptimize
- Access to your hosts administration panel (usually DirectAdmin or cPanel)
Spoiler: the above tools will give your WordPress website the ultimate boost in loading times. At the end of the article I’ll hand out some pro-tips to completely utilize your hosting package’s maximum potential.
The WordPress-catalogue knows a lot of caching plugins which all promise to speed up your website. In my experience W3 Total Cache is the only plugin that holds up to that promise. Other plugins are to simple and ask for a great deal of resources, which are usually only available on VPS or Dedicated Servers. The minify option of W3TC is very resource intensive as well. That’s why we will not be using it. Instead we will follow the Developers’ personal suggestion and use Autoptimize.
Today I will show you how W3 Total Cache and Autoptimize will make you score higher in Google Pagespeed Insights and Pingdom.
Installing the Plugins
I assume you know how to install plugins from within your own WordPress installation. If not, click the link. After you’ve installed and activated the plugins through the repository, continue with this tutorial.


A few points:
1. minify JS is generally a bad idea
2. combine the files is risky, messy, and after HTTP/2 not really any point
3. inline CSS and then minify the HTML output is very effective
https://wordpress.org/plugins/inline-styles-littlebizzy/
use same time with:
https://wordpress.org/plugins/minify-html-littlebizzy/
Hi Mateo,
Thank you for your remarks. As mentioned in the post, this post contains outdated information. But thanks anyway.
I have used Autoptimize its amazing plugin if use wp super cache with Autoptimize then you will get better results.