How to get a 100/100 Score on Pingdom & Google Pagespeed Insights
This document contains outdated information.
I’ve revisited this topic recently, containing more relevant and up-to-date information aligning with the new specifications provided by Pingdom and Pagespeed Insights. If you’re looking for an up-to-date, quick and easy way to achieve a 100/100 on Pagespeed Insights and Pingdom. I suggest you follow that link.
Although this plugin is quite extensive in its options. Setting it up is actually quite easy. If you’re on a shared hosting environment, you can leave Database and Object Cache disabled in most cases.
Leverage Browser Cache & Reduce Server Response Time with W3 Total Cache
W3 Total Cache will help you get rid of the following suggestions in Pingdom & Pagespeed Insights:
Pingdom:
- Remove query strings from static resources
- Leverage browser cache
Google Pagespeed Insights
- Reduce server response time
- Leverage browser caching
Are you on shared hosting? Make sure you read the pro-tips at the end of this articles. You might be able to squeeze an extra performance boost out of your shared hosting package.
General Settings
If you’re on shared hosting, you can enable page cache and browser cache. If you have a VPS or Dedicated Server, you can install additional modules into Apache and enable Opcode: Alternative PHP Cache (APC).
Page Cache
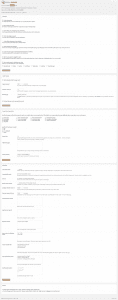
After you’ve enabled page cache on the General Settings page, make sure your settings replicate the settings from the image to the right (click to enlarge). These settings should be sufficient for most hosting environments, both shared and (partially) dedicated.
If you don’t have SSL enabled on your website, you can disable Cache SSL (https) requests.
Under Cache Preload, the default settings are fine. If you have a lot of posts, but you’re on a shared hosting environment, keep the pages per interval to a low value. The default of 10 should work fine for most websites. Allow your server some rest between each update interval and set it to a minimum of 300 seconds. Always make sure that your site is able to preload all your pages before it reaches Garbage collection interval.
In the Advanced Section, pay attention to the Garbage collection interval. This is set to 3600 seconds by default. For busy sites, this is fine. Keep in mind that it is a resource intensive task. So not so busy sites (on shared hosts) should make this interval longer. I set it to 86400 seconds (1 day), which should be fine for most shared hosting environments (or not so busy sites).
Browser Cache
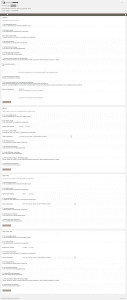
After you’ve enable browser cache on the General Settings-page, replicate the settings from the image to the right (click to enlarge) to your W3 Total Cache-installation.
You will see that the default settings are accurate for most environments. After you’ve replicated the settings in the General-tab, scroll down to the other sections and make the following adjustments:
Enable disable cookies for static files under CSS & JS and Media & Other Files. Set Expires header lifetime to 86400 seconds under HTML & XML.
That’s it! W3 Total Cache should give your website the greatest boost and slice your loading times in half. Leverage Browser Caching and reduce server response time should’ve disappeared as a suggestion from Pingdom and Google Pagespeed Insights.
When you’re ready to tweak your website’s performance in-depth, move on to the next chapter.


Hey there, I was going to ask you how to fix the mobile google analytics score but it looks like you have the same problem. https://gtmetrix.com/reports/daan.dev/HV5KT0Ue
Do you know what’s causing this? Does mobile have a different file?
Hmmm. Thanks for notifying me of this! I’ll look into it and get back to you. Thanks!
Thank you for this article! It’s helped my Pingdom score significantly. I couldn’t get it to work for the longest time because I still had “Minify” checked in W3 Total Cache. But once I did that it worked like a charm.
Oh, that’s good to hear! Thanks for stopping by!
Thank you for this article. But above the fold optimization plugin is not available for download. Some help would be appreciated
Here you go mate: https://github.com/optimalisatie/above-the-fold-optimization
Just click on the “Clone or download” green button and Download Zip.
You can then install it. Cheers!
Thanks for adding that link to the conversation, Clay! I didn’t know about that. As an other solution, the paid variant of Critical CSS generator auto-detects everything and allows you to skip a few steps in my tutorial. I should probably update this in the near future. [Updated the plugin’s link with the Github-variant. Thanks, Clay!]
Hi Clay – thanks for your time in putting this out there.
I’m keen to perfect these scores and have followed your advice; however, pingdom is still giving my website (https://justwebbit.com) a very low score and suggesting I combine external Javascript and CSS…
Any ideas why?
Any more input, very much appreciated.
Gav
Hi Gav,
Have you enabled Autoptimize and set it to combine CSS and JS? Autoptimize is usually very efficient in gathering all loaded JS and CSS files, so by tweaking its settings you should be able to have it completely combined!
Hey on my site http://www.onlinerechargetricks.com/beautiful-girls-dp-for-facebook-whatsapp-full-hd/ .google pagespeed is showing leverage browsing issue, can you tell me how to solve without plugin?
You’re using Adsense, which is externally hosted. So I suppose there’s no way for you to correct that. I’m working on a way to host Adsense locally as well, but this’ll take some time.
Hello Daan,
Thanks so much for this tutorial. But I have a dumb question: should all the check boxed in Minify of W3 Total cache be disabled?
Yes, minify is a feature CSS and JS minification. However, Autoptimize is way better at this. Check the intro of page 3 of this post and you’ll see the entire explanation why I chose Autoptimize over W3TC.